Why do prints have a green hue?Updated 6 months ago
The Nailbot Ink Settings feature allows you to modify how the colors of your images and photos are printed!
We’ve seen some minor ink batch variability in early drops so we created a new beta feature for you to test. We have Alternate and Primary options. Once you switch the profile and press save, the settings will save for all your prints unless you go back in and reswitch. (I.e. You don’t need to keep saving the settings if you are satisfied with the settings).
For example, if you want to print an image or photo that is darker in hue, change the Ink Settings from “Primary” to “Alternate” to remove any unwanted blue hues.
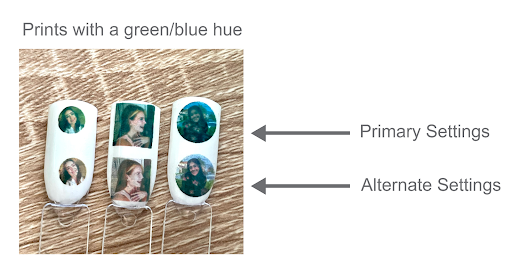
If your prints are printing out with a “green” or “red” hue you may need to adjust the ink settings of your Nailbot. Follow the steps below to do this.
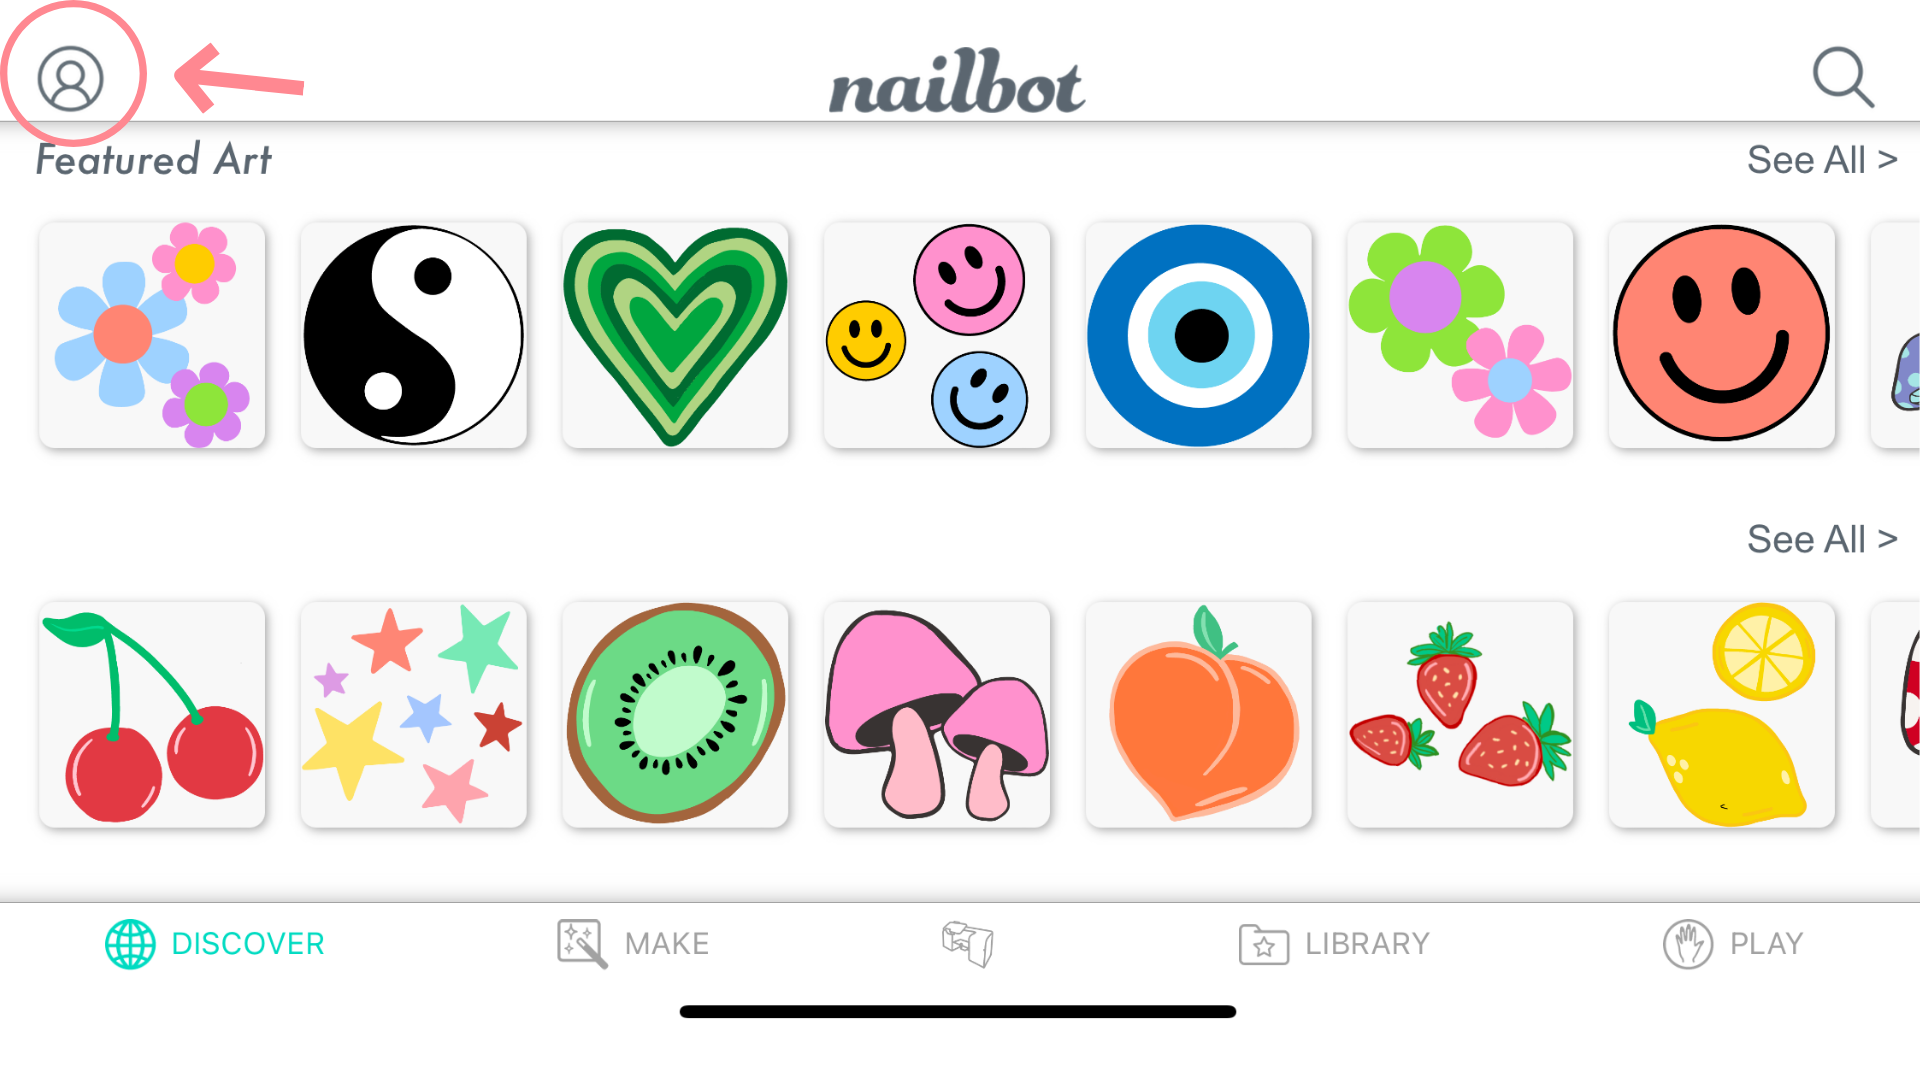
From the Discover Section of your Nailbot App, navigate to your settings by tapping on the Profile Icon in the top left corner of the app.
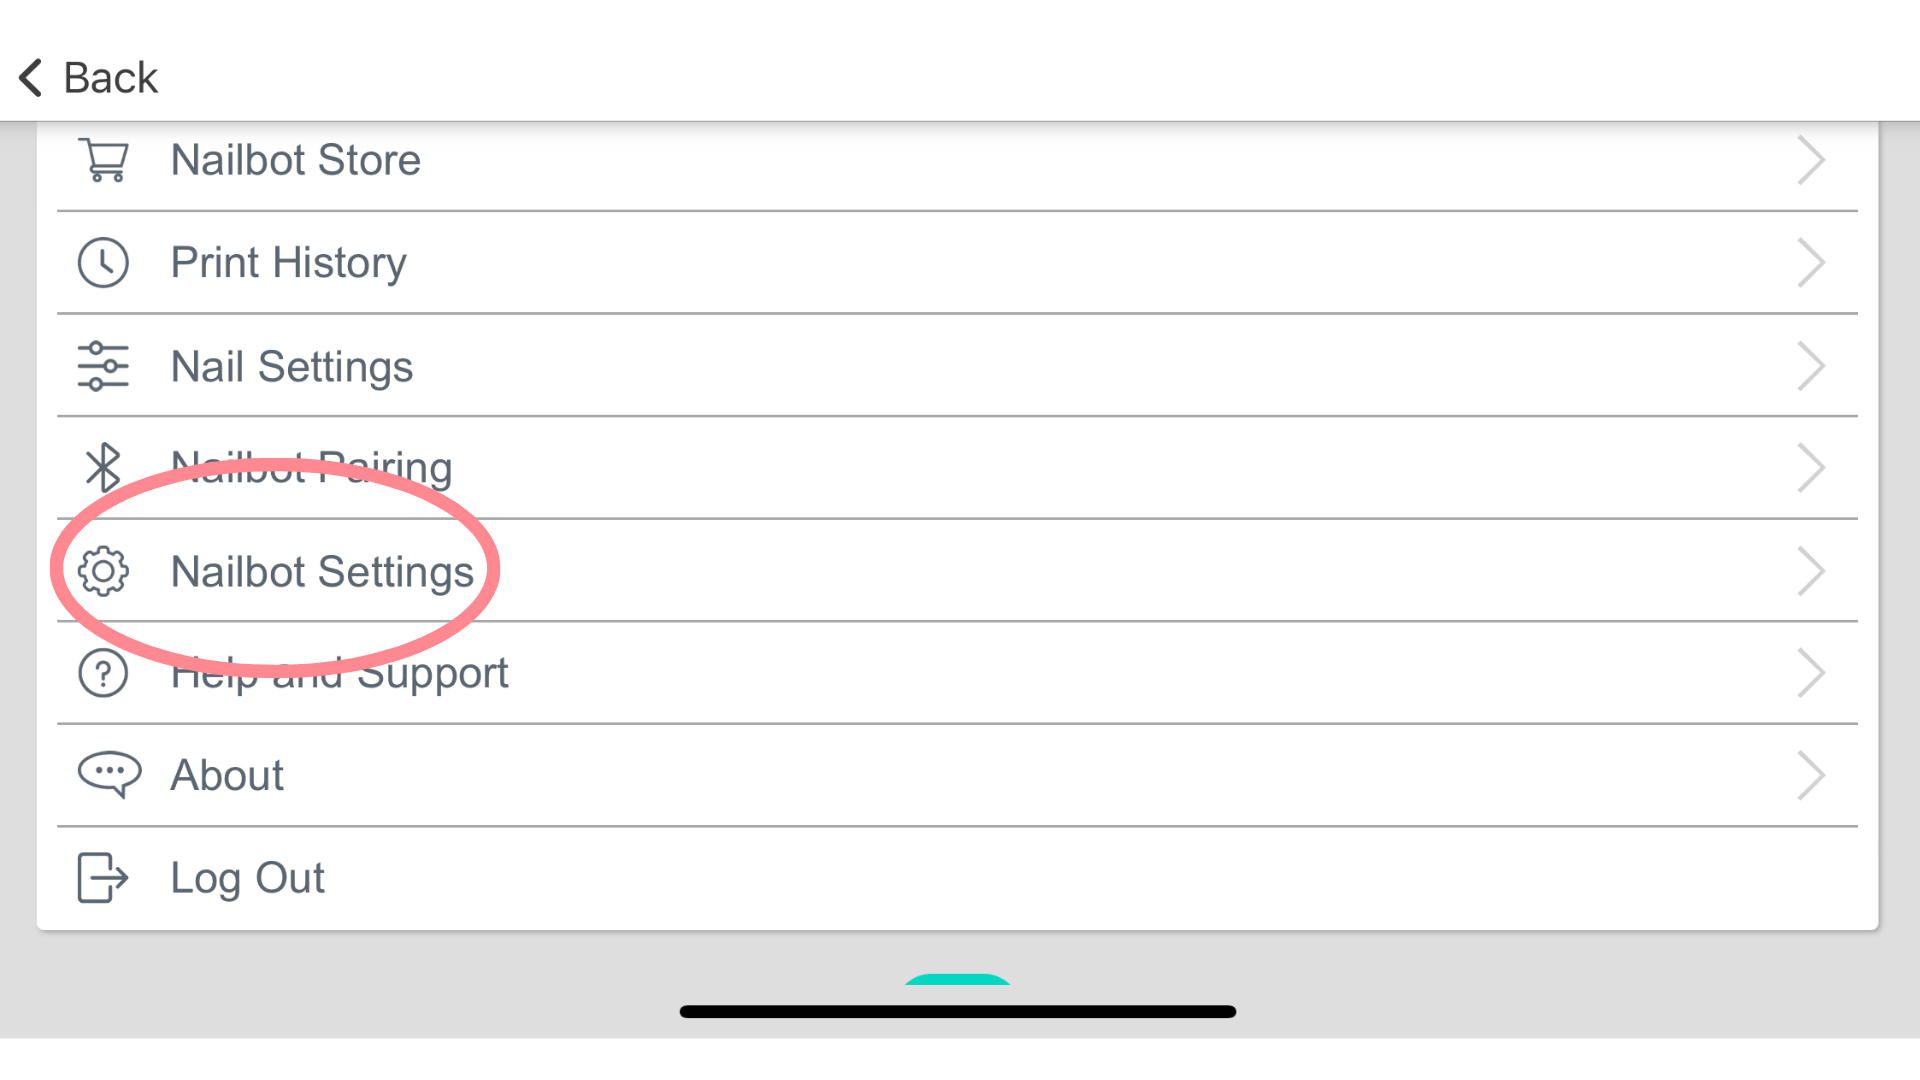
Scroll down and tap on “Nailbot Settings”.
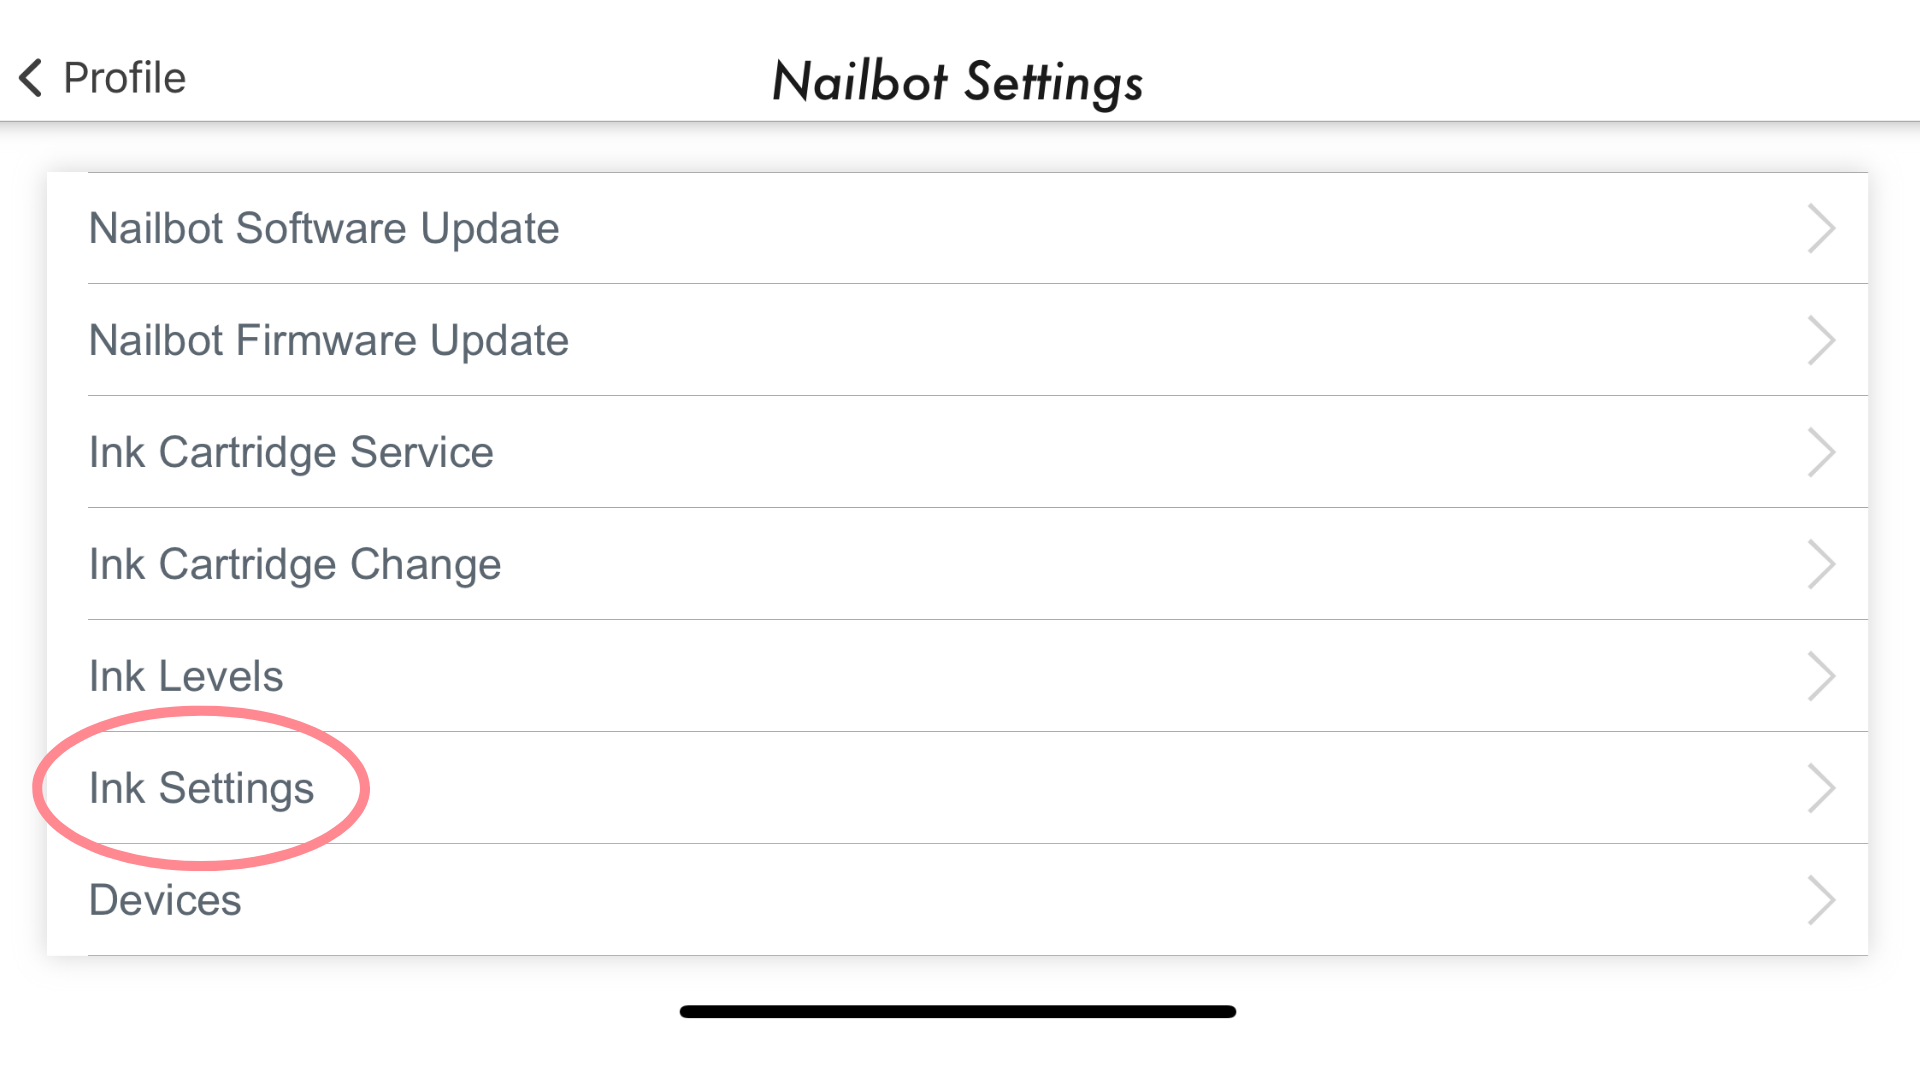
Scroll down and tap on “Ink Settings”
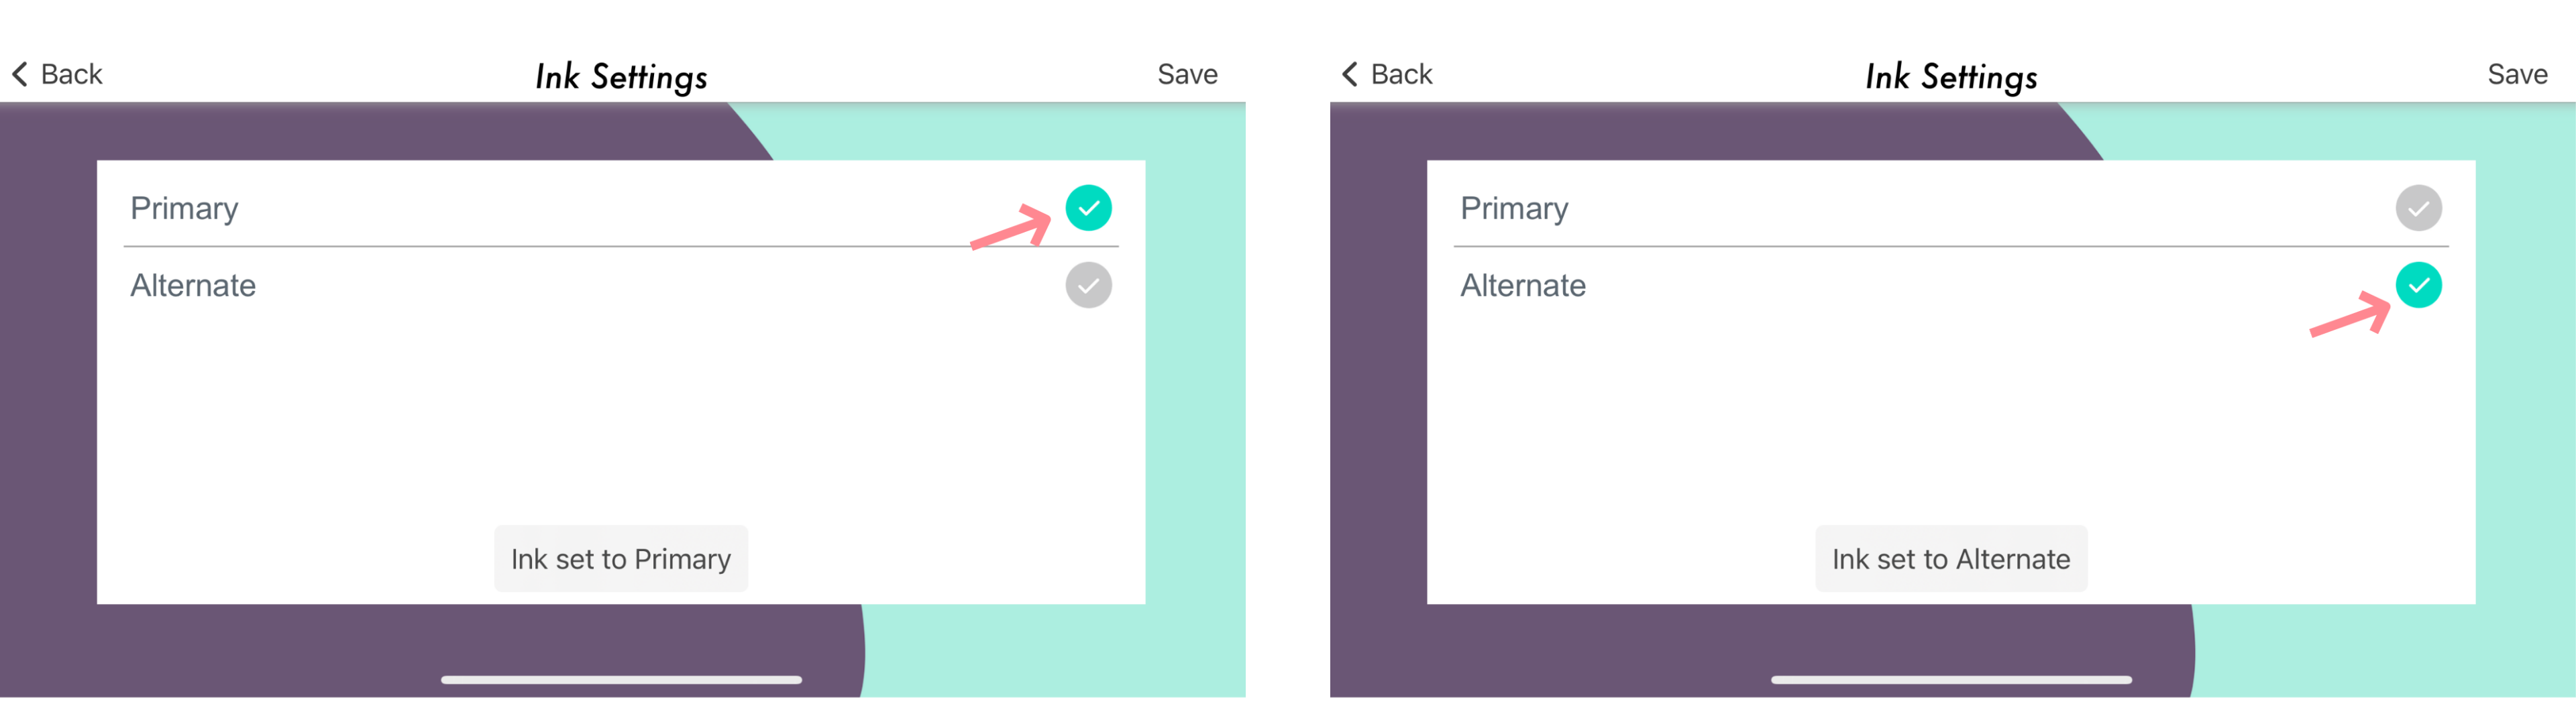
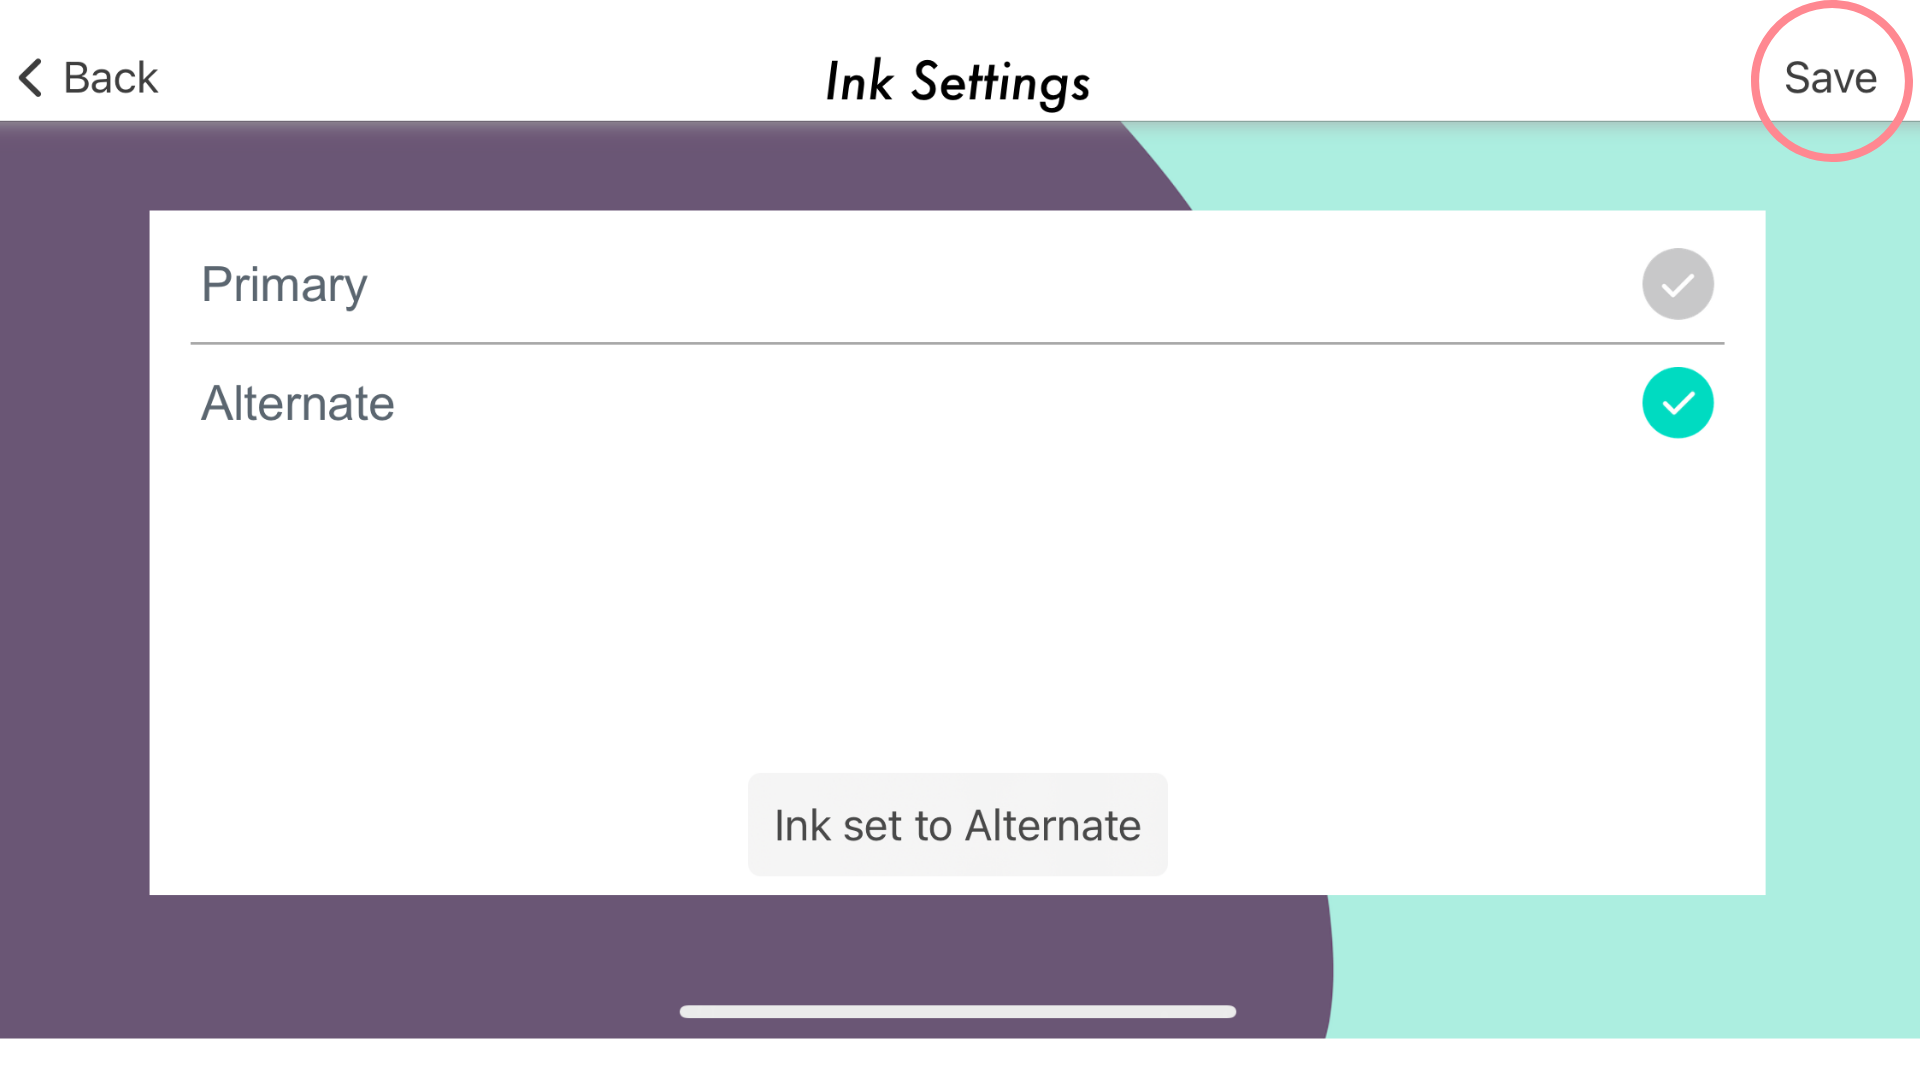
Once in Ink Settings, you will see two profiles. A Primary profile and an Alternate profile. (Primary is the default profile and should be selected)
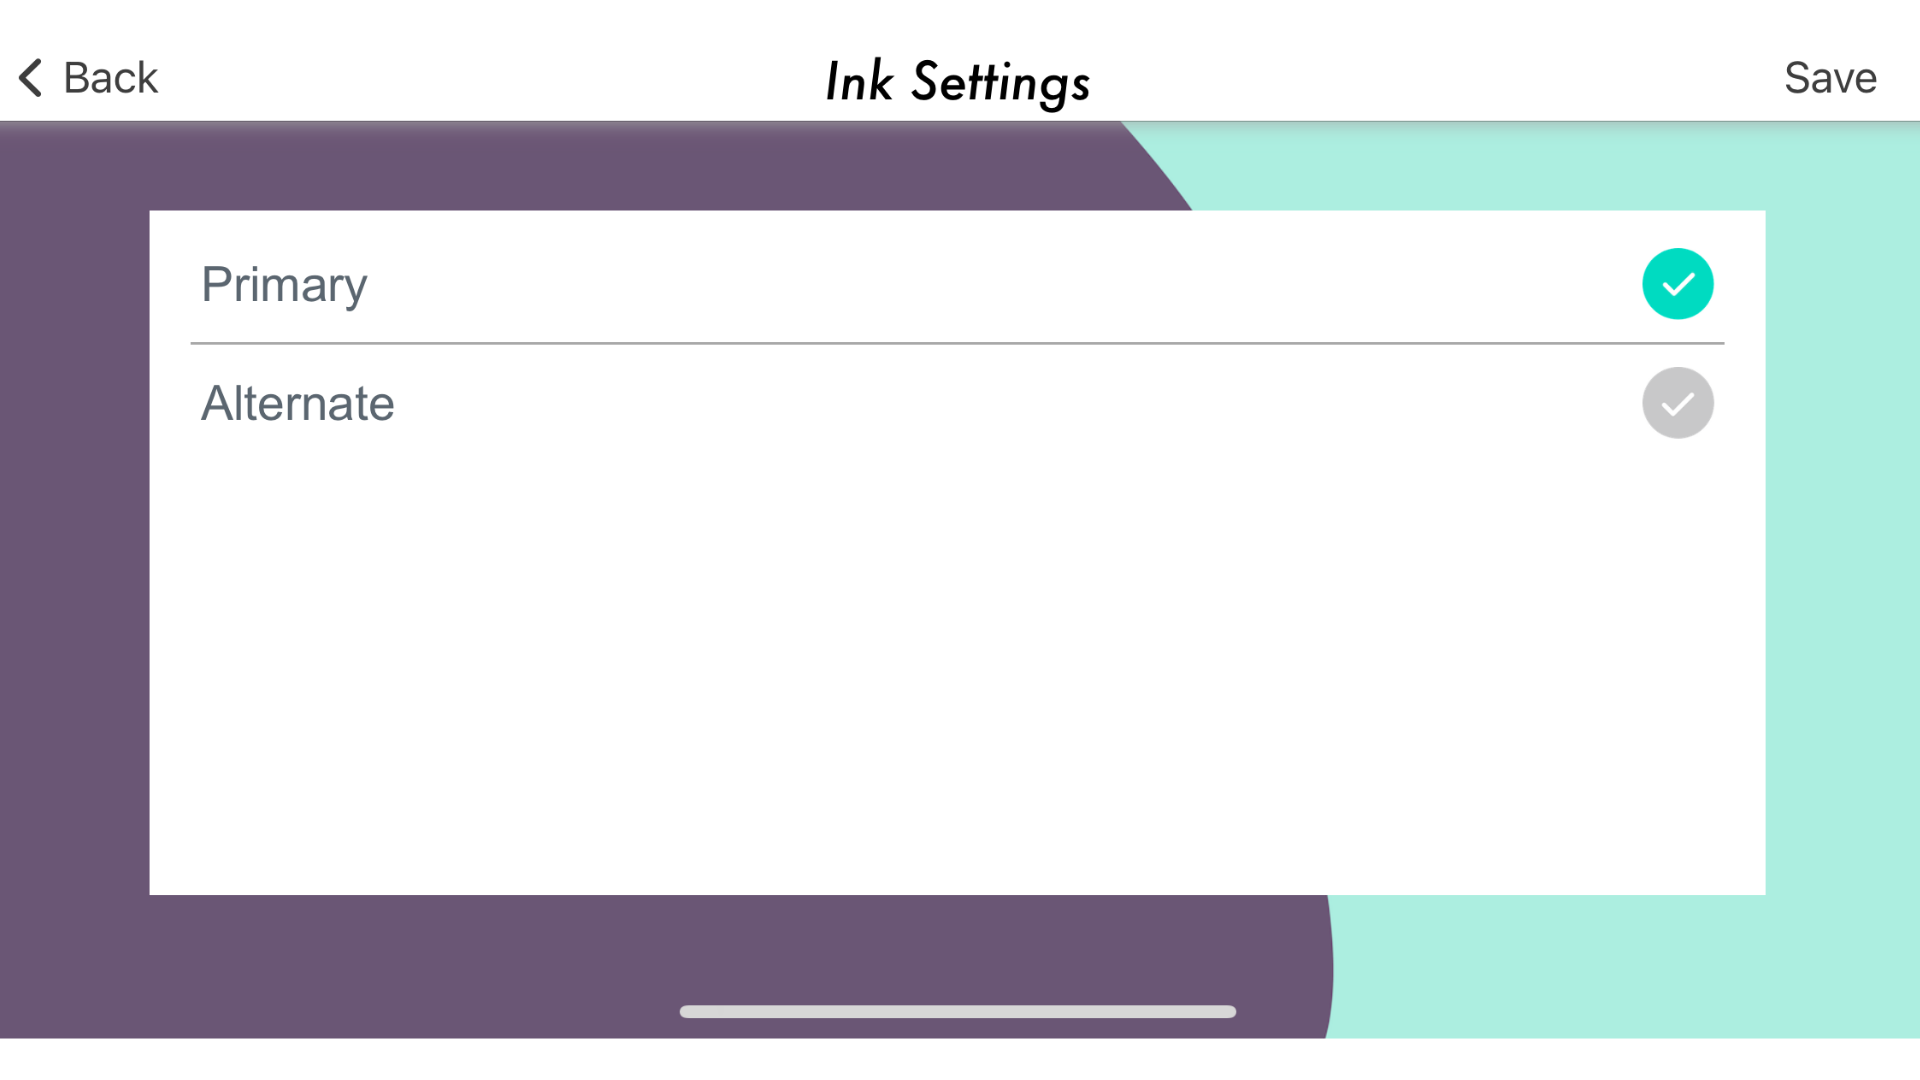
To change your Ink Settings to a different profile, simply tap on the grey checkmark. It will turn to a teal checkmark when the profile is selected.
Make sure to tap “Save” in the top right corner of your screen to lock in your Ink settings.
7. You can now begin printing with your new Ink profile.
A quick recap:
Go to the Profile Section
Select Nailbot Settings
Select Ink Settings
Choose which Ink Settings you would like to print with and Save. (Primary/Alternate)
Print Mani Magic!
If you are still experiencing issues, please reach out to [email protected] for assistance.